
I love to bake, and that works out well, because I'm pretty OK at it. I also love to decorate what I bake. That works out significantly less well:

Disapproving cake disapproves.
The story of this cake is kind of epic*, so I'm going to split it into two parts: test cake today, actual presented cake tomorrow.
Back in March, I saw this blog post and thought "Holy crap! A Lego cake! My friend loves Legos! I will definitely make that for her birthday!" skimmed it briefly and bookmarked it for later reference. When birthday time rolled around, I remembered the cake, but forgot about the blog post and just did my own thing. I would say this was a bad idea, but if you scroll down to the bottom of the original post, their cakes don't look that much better than mine (or so I tell myself).
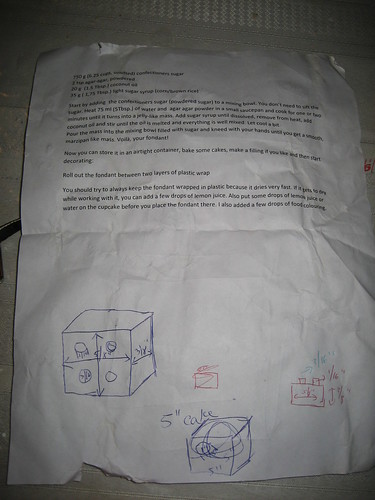
The first thing I had to do was figure out what I wanted to make the thing out of. I needed to choose a cake, frosting and fondant. I decided on a double recipe of the yellow cake from Vegan Cupcakes Take Over the World in a 9" x 13" pan, and used apricot preserves to stick all the bits together instead of making frosting, since this was just the test round and I'm pretty experienced, frosting-wise. I'd never made fondant before, though, and didn't even know where to begin. Luckily, a quick PPK search showed that many people recommended this recipe, so I gave it a shot. I didn't have light sugar syrup (and wasn't even 100% sure what it was), but had some chocolate brown rice syrup (brown rice syrup mixed with cocoa powder) and decided to give that shot. The fat component of the fondant is coconut oil. I'm not the biggest fan of coconut, so I thought it'd be nice to add some chocolate to the fondant so it wasn't too coconutty. It came out a little dry (maybe because of the cocoa powder), but adding a bit of water fixed it right up. I couldn't taste the chocolate at all, and the coconut flavor was nice and not too strong, so I decided to use a different sweet syrup for the final cake, so I wouldn't have to worry about trying to color over the brownness of the chocolate.
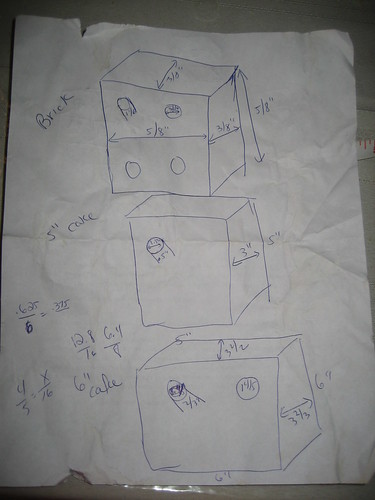
The next step was figuring out how, exactly, to build the cake. It took a lot of playing with Legos, measuring, drawing and math. At the end of the day, I ended up with this mess, which clearly illustrates - no pun intended - why I don't draw on any of my cakes:
Once I had my measurements all set, it was time to actually get to work putting the cake together:
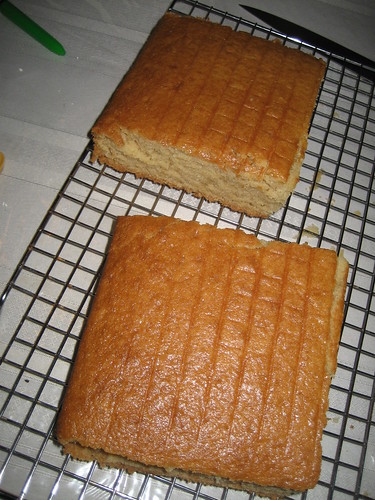
Cake cut into two layers and trimmed to size.

Apricot preserves will stick the layers together.
Cutting out the little knobbly bits for the top of the cake was probably the hardest shaping part. Thankfully, I have a set of circular cookie cutters (useful for making cannoli shells, mini pie crusts, and, apparently, knobbly bits) and one was the exact right size. They then needed to be cut in half because they were too tall, which led to a bit of squishing.
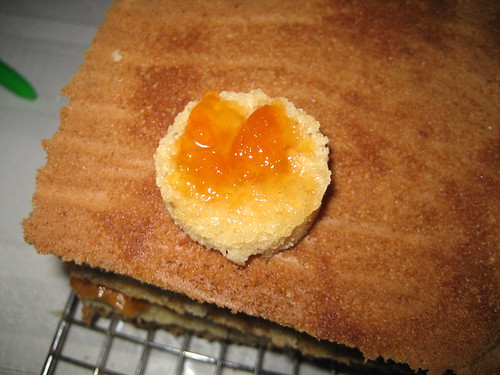
Using apricot preserves to stick a knob on.

Pre-fondant, with a Lego brick for scale.
Then it was time for fondant. I completely forgot that you need to put something between your cake and your fondant for it to stick to. I rolled out a really large, thin sheet of fondant, draped it over the cake and shaped it around as best I could, at which time the fondant became too heavy to support itself and almost the entire vertical portion ripped off and I stood there, using my tears to stick it back together.
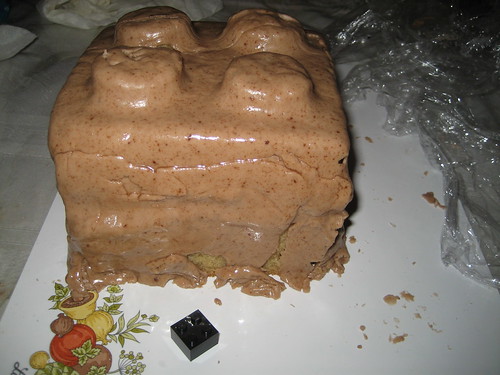
Terrible. And the color does it no favors.
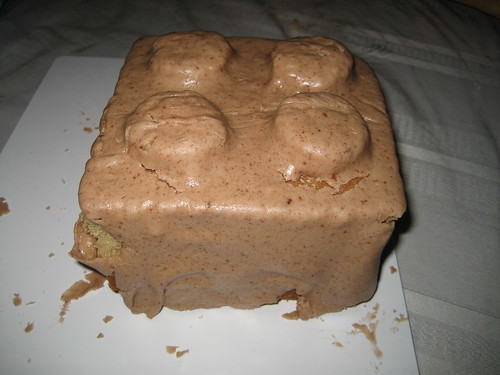
The top turned out relatively well, but that's not really saying much.
So that was the test cake. It looks pretty crap, but taught me some valuable lessons, which didn't really make my next attempt come out any better. Tune in next week for the exciting conclusion of this cake saga.
Have a great weekend, everyone!
*And I need to come up with twenty-two posts this month.

2 comments:
I am sorry this didn't work out for you! I always use a thin layer of jam mixed with a little bit of water and warmed up to make the fondant stick to the cake. And to be honest, I never used it for such a huge baking project like yours. Maybe you could add even a bit more water to make it more flexible. Light corn syrup can be best substituted for the sugar syrup. And for the coconut fat...I use it because it gets soft at room temperature which makes the fondant easier to work with if you knead it with your warm hands. I sometimes go for the refined version (coconut fat) which doesn't have a coconutty taste.(Plus, here in Germany I can get an unrefined version that doesn't have any flavour.) Before I leave the longest comment in history I stop here to wish your luck with your next cake projects!
Thanks for the informative response, Mihl. The screw up here is definitely my fault, not the recipe's. The recipe is great. I tried it again and it worked much better (will post about that Monday). Thanks for sharing your recipes, they're great!
Post a Comment